Conversations Magazine July/August 2026

Conversations Magazine July/August 2026
Showing posts with label chef bruce tretter. Show all posts

Tuesday, December 25, 2012

"Quick and Easy Cooking" with Bruce Tretter


Turkey Nachos

Talk about quick and easy – and lots of freedom of choice. All it takes to make turkey nachos is your favorite corn (or any) chips, leftover turkey, canned beans (that’s optional) and melted cheese topped with your choice or a combination of sliced avocado, chopped tomato, chopped onion, sour cream or plain yogurt and/or salsa.

Preparation Time: 2-10 minutes depending on number and type of ingredient
choices
Cooking Time: 15-20 minutes

Ingredients
(for 2-4)

Cooking Spray
Favorite Corn (or any) Chips
Cooked Turkey
12-Ounce Can of Beans
Favorite Sliced, Shredded or Grated Cheese (I’m using shredded cheddar cheese,
but any cheese will work)
Ripe Avocado (optional)
Medium Sized Tomato (optional)
1/4 Onion (optional - I like using either red or sweet onions for this, but any
onion will work)
Sour Cream or Plain Yogurt (optional)
Salsa (optional)

Equipment

Baking Dish
Colander (if you’re using canned beans)
Can Opener (if you’re using canned beans without a pull tab)
Spatula or Big Spoon
Small Sharp (Paring) Knife
Cutting Board
Tablespoon
Timer
Pot Holder or Folded Dish Towel

1. Place an oven rack half way up from the oven bottom, and preheat the oven to 350 degrees (180 degrees Celsius).


2. Open, drain and rinse a can of beans (optional) with cold tap water in the sink.

3. Spray a baking dish with a light coat of cooking spray and top with a generous, even layer of your favorite corn (or any) chips.

4. Top the chips with a generous, even layer of shredded turkey meat, beans and shredded cheese.

5. When the oven has warmed to 350 degrees (180 C), put the baking dish in the oven and set a timer for 20 minutes.

6. While the nachos cook, prepare your choice or a combination of ripe avocado, tomato and or onion as follows:

Avocado: Cut a ripe avocado in half lengthwise around the seed and twist the two avocado halves apart. Remove the seed by holding the avocado half with the seed still attached seed side up on the cutting board - making sure your fingers are not in the intended knife path - and driving the knife blade into the seed. Twist and lift the seed from the avocado half. Remove the seed from the knife edge by pinching the down on the seed from the back, dull side of the knife. Cut the avocado half again in half lengthwise into quarters, and peel off the skin. Cut each avocado quarter into slices 1/4 - 1/2 inch (6-12 mm) wide, and cut the slices in cross section into pieces also 1/4 - 1/2 inch (6-12 mm) wide.

Tomato: Rinse and shake a tomato dry in the sink. Then carefully make an upside cone shaped cut around the stem patch to remove the tomato core as shown in the third picture below. Cut the tomato in half lengthwise. Cut each tomato half into lengthwise slices about 1/2 inch (12 mm) wide. Then cut the slices in cross section into pieces also about 1/2 inch (12 mm) wide.

Onion: Cut a red (or any) onion in half, and cut one of the onion halves in half again. Cut off the tough onion stem and root ends and peel the onion skin. Cut slices about 1/4 - 1/2 inch (6-12 mm) wide, making sure not to cut through the back of the onion to keep the slices bound together, and chop those slices into pieces also 1/4 - 1/2 inch (6-12 mm) wide.

7. When the timer sounds, carefully remove the cooked nachos from the oven with a potholder or folded dish towel. The nachos are done when the cheese on top has melted.

8. Scoop the nachos from the baking dish onto a plate with a spatula or big spoon, and either have them as is or top them with your choice or a combination of plain yogurt or sour cream and/or salsa.


And that’s all there is to making turkey nachos quickly & very easily.

As always, if you’re more visually oriented, you can get complete step-by-step picture book directions by visiting the Gotta’ Eat, Can’t Cook site at www.gotta-eat.com.  Just click the downloads tab from the home page, scroll down to “Chicken & Turkey” and click “Turkey Nachos” for a free step-by-step picture book recipe.  

"Quick and Easy Cooking" with Bruce Tretter


Stress-Free Roast Turkey

TIPS:

1.  This is the easiest, fastest, and most stress-free way to roast a turkey weighing up to 15 pounds that I know (most turkeys sold weigh 12-14 pounds). It requires using HIGH heat (450 degrees), roasting the turkey breast side down until the last 30 minutes of cooking (to preserve the moisture and tenderness of the low-fat breast meat) and NOT filling the turkey with stuffing, which otherwise only adds mores cooking time and causes the meat to dry out.

2.  I HIGHLY recommend using an ovenproof meat thermometer to ensure safe cooking doneness. They’re inexpensive and very easy to use. I avoided buying one for far too long until a butcher who has provided excellent advice very kindly suggested recently I’d be making a mistake otherwise. I listened - and obeyed - and haven’t looked back since.

Fridge to Finish Time: Plan about 4 1/2 - 5 hours to prepare a 12-15 pound turkey as follows: 1 hour to let the turkey warm at room temperature for more even cooking, about 2 – 2 ½ hours to roast at 10 minutes per pound (using the HIGH oven heat method mentioned here), and at least 30 minutes after roasting to let the turkey rest before carving.

Ingredients
(for at least 12 people)

12-15 Pound Turkey
Cooking Spray
Garlic Salt or Garlic Powder
Italian Seasoning
Paprika
Ground Black Pepper

Equipment

Paper Towels
Potholders
Roasting Pan
Roasting Rack (optional but keeps the turkey out of the fat as it cooks)
Large Fork
Sharp Knife
Large Cutting Board
Ovenproof Meat Thermometer
Timer

1.         Note the weight of the turkey on the packaging label, and calculate the total cooking time in minutes by multiplying the weight of the turkey in pounds by 10 minutes per pound. (I recently cooked a 12 1/2 pound turkey. I discounted the half pound and then multiplied 12 by 10 for 120 minutes or 2 hours total cooking time.)

2.         Take the turkey out of its packaging in the sink. Remove the giblet bag and neck, stored individually or separately in either or both the hind or neck cavity. Then use a sharp knife to cut away excess skin at the top of the turkey’s neck, if necessary.

3.         Rinse the inside and outside of the turkey, and pat it dry with paper towels.

4.            Put a roasting rack (optional) in a roasting pan, and spray both the rack and pan
with a light, even coat of cooking spray to make cleanup later a lot easier.

5.         Stand the turkey in the roasting pan, and add a good shake of garlic salt, Italian Seasoning, paprika and ground black pepper first on the inside and then outside of the turkey starting with the breast side and finishing with the bottom of the turkey facing up toward you.

6.         Leave the turkey breast-side down in the pan to rest at room temperature for 1 hour to allow for more even cooking

7.         After 1 hour, set an oven rack in the lower third of the oven, and preheat the oven to 450 degrees.

8.          When the oven temperature reaches 450 degrees, put the turkey in the oven,
and set a timer for 30 minutes less than the total cooking time. This will be the number of minutes the turkey will cook breast-side down. (As noted in step 1, the total cooking time for the turkey I roasted recently was 120 minutes. I subtracted 30 minutes from the total cooking time and set the timer for 90 minutes or 1 hour and 30 minutes.)

9.            When the timer sounds, CAREFULLY use potholders or folded dish towels to
remove the breast-side down turkey from the oven. Then CAREFULLY use a large fork and large knife (or kitchen utensils of your choice) to lift and turn the turkey breast-side up. (If you’re using a roasting rack, you’ll notice rack marks on the breast, but don’t worry, those will fade during the last 3o minutes of breast side up roasting.) If you’re using an ovenproof meat thermometer, insert it in a thick section of breast meat next to the thigh muscle WITHOUT touching any bone.

10.        Put the turkey back in the oven, and set a timer for 30 minutes.

11.          When the timer sounds, CAREFULLY remove the turkey from the oven with
potholders or folded dish towels and check it for doneness. Turkey meat is safely cooked when it has reached an internal temperature of at least 180 degrees and the breast meat is white and leg meat grey throughout with no runny red liquid. If, however, the temperature on your meat thermometer (if you’re using one) is less than 180 degrees or any of the meat is still red or pink with red runny liquid, keep cooking the turkey until the meat is done as mentioned above.

12.       When the turkey is safely cooked, transfer it from the roasting pan to a
cutting board, and let the turkey rest for at least 30 minutes both to let the meat juices inside settle and make the turkey safer to handle before carving.

And that’s all there is to roasting a fantastically, flavorful and tender turkey with as little stress as possible!

For visual help with this recipe, you can get complete step-by-step picture book directions by visiting the Gotta’ Eat, Can’t Cook site at www.gotta-eat.com.  Just click the “Chicken & Turkey” button from the banner in the middle of the homepage. Then, click the picture of “Stress-Free Roast Turkey” for a free PDF.

Friday, November 2, 2012

Quick & Easy Cooking w/Bruce Tretter: Pasta w/Sausage & Fig Sauce

Pasta with Sausage & Fig Sauce

The sausage and fig sauce described here can be made in the time it takes to boil water and cook spaghetti, especially if you use packaged precooked sausage. I know fresh figs are seasonal and are sometimes tough to find. No problem. You can make this sauce using just about any fruit - apples, pears, peaches or plums will work just fine.

Preparation Time: 10-15 minutes
Cooking Time: 10-15 minutes

Ingredients
(for 2-3)

½ Box or 8 Ounces Pasta
Salt
2 Handfuls Fresh Figs
3-4 Precooked Sausages (I like using sweet Italian or sun dried tomato chicken sausages for this sauce, but your favorite sausage will work fine)Italian Seasoning
Sun Dried Tomatoes
Olive or Vegetable Oil (I’m using the oil from the sun dried tomatoes)
2-3 Garlic Cloves
1 Bell Pepper (red, yellow or orange bell peppers are more flavorful and sweeter than green
bell peppers)
Grated Parmesan Cheese
Crushed Red Pepper
Balsamic Vinegar (optional)

Equipment

10-12 Inch Frying Pan
Spatula
Medium Sized Pot
Large Knife
Cutting Board
Large Spoon
Colander
Tongs (to serve pasta - can also use a fork)
Timer

1. Fill a medium sized pot about half full with cold tap water. Put the pot on the stove, and turn on the burner to HIGH heat.

2. While the water warms, pull 2-3 garlic cloves from a fresh garlic bulb. Put 1 garlic clove at a time under the flat side of wide bladed (chef’s) knife, and use the heel of your hand to press down on the top flat side of the knife with enough pressure to break the garlic clove open to make peeling the garlic skin much easier. Peel the garlic skin. Then slice and chop the garlic into small pieces.

3. Prepare the fresh figs by first removing the stems. Then cut the figs in half lengthwise and cut them again in cross section into bite sized pieces.

4. Prepare the bell pepper by cutting the pepper in half lengthwise without cutting into the seed cluster in the middle of the pepper. Pull the pepper halves apart at the stem and remove the seed cluster. Cut each pepper half lengthwise into strips 1/4 - 1/2 inch (6-12 mm) wide, and then cut those strips in cross section into pieces also 1/4 - 1/2 inch (6-12 mm) wide.

5. Cut about a handful of sun dried tomatoes (estimate - you don’t have to measure them in your hand) into strips about 1/4 inch (6 mm) wide, and then cut those strips in cross section into pieces also about 1/4 inch (6 mm) wide.

6. Cut 3-4 precooked sausages in cross section into slices 1/4 - 1/2 inch (6-12 mm) wide.

7. Let the water come to a big bubble, rapid boil not just a small bubble, fizzy boil to help ensure the pasta cooks properly to desired doneness. When the water comes to a full boil, add a good shake of salt (optional but adds flavor to pasta) and ½ box or 8 ounces of pasta to the boiling water and stir until all the pasta is submerged in the boiling water.

8. Put the frying pan on the stove, and turn on the burner to MEDIUM heat.

9. Let the water in the pasta pot come back to a full boil. Then turn down the burner heat to MEDIUM to prevent the pot from boiling over, and cook until the timer sounds.

10. Put a colander in the sink, and check the frying pan for the proper cooking temperature by wetting your fingers with tap water and flicking the water onto the pan surface. The pan is warmed to the proper cooking temperature when the water sizzles on contact with the pan surface and quickly evaporates.

11. When the frying pan is properly warmed, add just enough olive or vegetable oil to coat the pan surface evenly (Here’s a quick tip. Instead of using a separate bottle of olive oil, I used a shot of oil from the sun dried tomato jar for a little added flavor). Then, right away, add the chopped garlic, bell pepper and sausage. Stir occasionally and cook for just a few minutes until the garlic becomes fragrant. Then add the chopped figs and sun dried tomatoes along with a good shake of Italian seasoning and shot of balsamic vinegar (optional but adds a rich sweet and sour flavor to the sauce).

12. When the timer for the pasta sounds, pour the pasta and hot water into the colander in the sink.

13. Stir the sauce occasionally until the bell peppers just start to soften but are still firm, not mushy, and the sauce looks about as shown in the picture below on the right.

14. Use tongs or a fork to put the freshly cooked pasta in a bowl (or onto a plate) and top with sauce.

15. Either have the pasta with sausage and fresh fig sauce as is or topped with your choice or combination of grated Parmesan cheese and/or crushed red pepper to taste.


For complete easy to follow step-by-step picture book directions, just go to the Gotta’ Eat, Can’t Cook website at www.gotta-eat.com. 

Quick & Easy Cooking w/Bruce Tretter: Sweet & Savory Salad

Sweet & Savory Salad


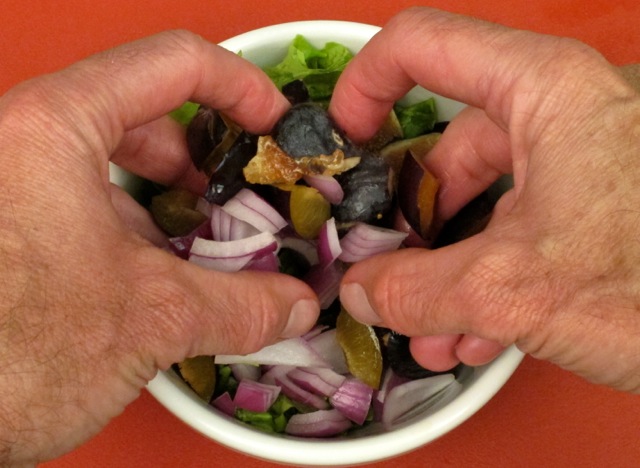
Like a full orchestra – or rock or jazz band – exploding with a richly balanced symphony of sound, a sweet and savory salad brings out the best in complimentary flavors. The sweet enhances the savory, and the savory does the same to the sweet. You bet!

Preparation Time: 5-10 minutes

Needed
(for 2)

1 Handful of Lettuce Per Person
Favorite Fresh Fruit
1/4 Red (or any) Onion
Favorite Dried Fruit
Favorite Nuts (I used walnuts, but again, any kind of nut will work)
Favorite Salad Dressing
Feta (or any) Cheese
Ground Black Pepper
Bowls
Sharp Knife
Cutting Board


1. Rinse and shake dry a handful of lettuce and fresh fruit.

2. Tear the lettuce into bite sized pieces.

3. Prepare the fresh fruit by removing the stems and seeds as necessary and cutting the fruit into bite sized pieces.

4. Cut a red (or any) onion in half, and cut one of the onion halves in half again. Cut off the tough onion stem and root ends and peel the onion skin. Cut slices about 1/4 - 1/2 inch (6-12 mm) wide, making sure not to cut through the back of the onion to keep the slices bound together, and chop those slices into pieces also 1/4 - 1/2 inch (6-12 mm) wide.

5. Put all the chopped ingredients into a bowl, top with a shot of salad dressing, and either have the salad as is or add your choice or a combination of a crunch of ground black pepper, feta cheese, nuts and/or dried fruit and serve.

For complete easy to follow step-by-step picture book directions, just go to the Gotta’ Eat, Can’t Cook website at www.gotta-eat.com.  Click the “salad and salad dressings” tab from the banner in the middle of the homepage. Then click the picture of “Sweet & Savory Salad” to download the step-by-step picture book recipe all entirely for free.

Sunday, September 16, 2012

Bruce Tretter Presents...Tomato, Fresh Basil & Mozzarella Cheese Salad


With such great, fresh ingredients like those you see below, there’s no need to top this salad with a lot of dressing, though a good shot of balsamic vinegar, with its evenly balanced and full-on sweet & sour flavor adds a great shot of zest!

Preparation Time: 5-10 minutes

Ingredients
(for 2)

1 Large Tomato
Handful of Fresh Basil
Mozzarella Cheese
Balsamic Vinegar (optional but adds zest)
Olive Oil
Salt
Ground Black Pepper

Equipment

Cutting Board
Sharp (Chef’s) Knife
Plate


1. Rinse and shake dry 1 large tomato and a handful of fresh basil.

2. Carefully use a sharp knife to make a cone-shaped cut at the top of the tomato to remove the tough, fibrous stem patch. Cut the tomato into slices 1/4-1/2 inch (6-12 mm) wide.

3. Pinch the basil leaves from their stems with your thumb and forefinger. Then bunch and hold the basil to the cutting board with curled fingers, and cut the leaves into pieces 1/8 - 1/4 inch (3-6 mm) wide. Finish by chopping the basil coarsely into smaller pieces.

4. Cut the mozzarella cheese into slices about 1/4 inch (6 mm) wide.

5. Assemble the salad by layering a tomato slice with sliced mozzarella and chopped basil and repeating until you’ve used all the ingredients.

6. Finish with light drizzle of olive oil, a light dusting of both salt and ground black pepper, and an optional but fully flavorful shot of balsamic vinegar.

You can get complete easy to follow step-by-step picture book directions by going to the Gotta’ Eat, Can’t Cook website at www.gotta-eat.com. Just hover over the “Salad and salad dressings” tab on the banner in the middle of the homepage. Then click the picture of “Tomato Salads” and click the picture of “Tomato, Fresh Basil & Mozzarella Cheese Salad” to download the step-by-step picture book recipe all entirely for free.